Understanding the List Example's Implementation
So knowing this, it is no surprise that we implemented our previous List example using a List variable like one above. Pop up the scripts for the demo by clicking  , for each of the kinds of sprites there. Note that other than each sprite, the Stage area itself can have scripts in it.
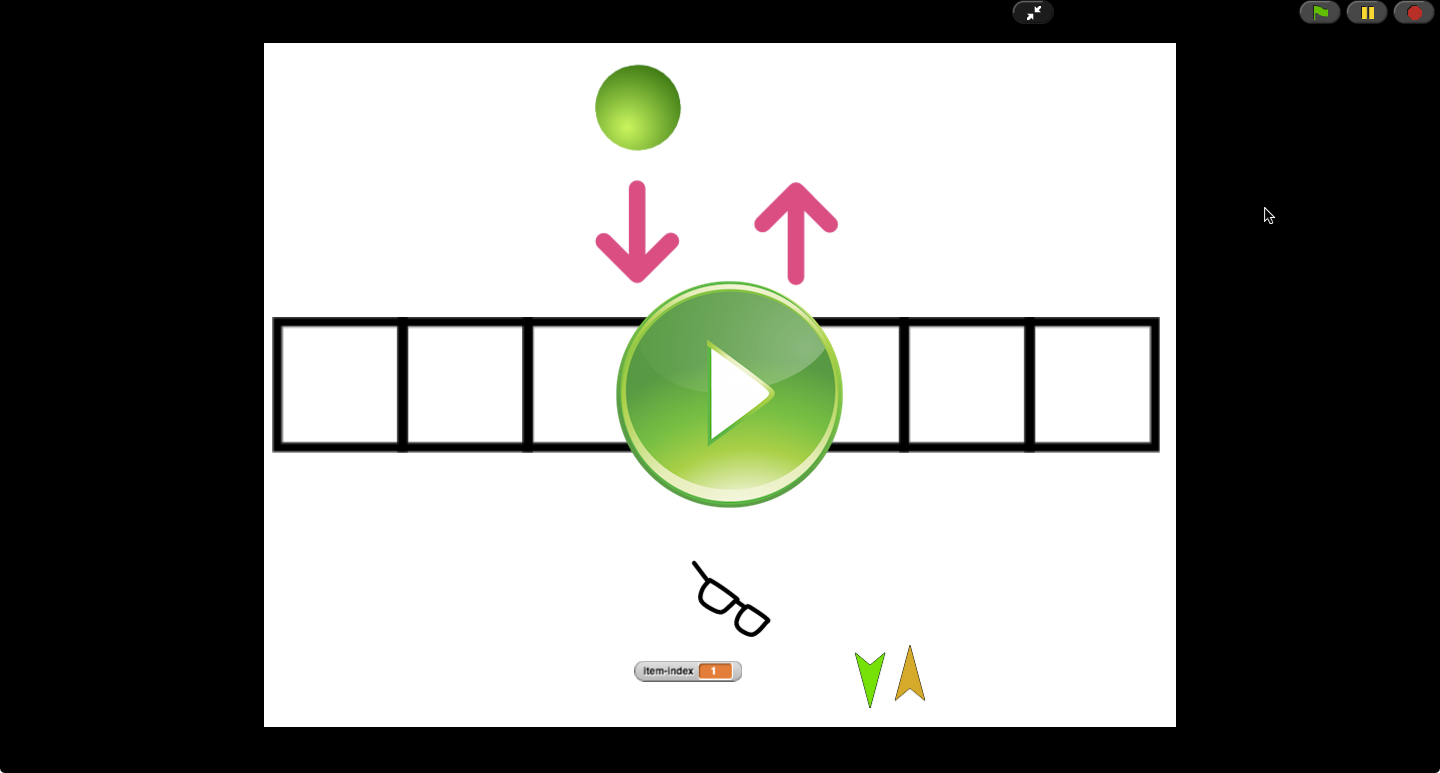
Here is a direct link to this exercise.
For this example, the Stage script, which is responsible to set up the stage initially, looks like this:
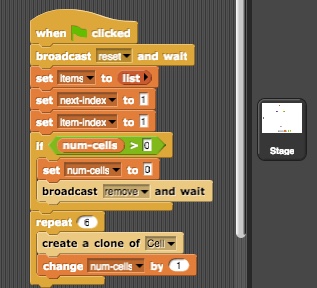
You can see I'm using a number of variables. But there we see a new kind of tiles that have to do with an idea called Message Broadcasts. Any thing (sprite) can at any time broadcast a message to all existing things. All things are also able to listen for, receive, and respond to a broadcast, identified by the message. In our script here, we can see a reset message and a remove message broadcast by the Stage. Therefore there must be some sprites that respond to these. Can you identify which ones receive which?
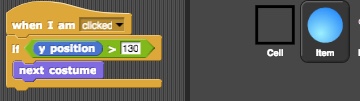
Only the Cell sprite responds to reset:
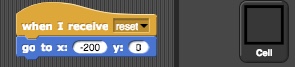
This ensures the first square is positioned at the far left.
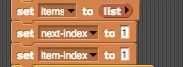
Going back to the Stage script, the next few tiles set the initial value for the variables items (an empty list), next-index (), and item-next ():
The next set of tiles clean up the stage if the stage had already been drawn before:
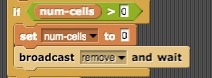
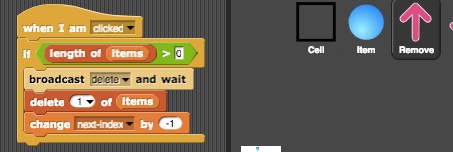
If the variable num-cells is not zero, it means we had previously set the stage. We broadcast the message remove to tell sprites to delete themselves. Let's see who is listening for that message. Looks like both Cell and Item (ball) sprites delete themselves from the stage when they receive this message:

This tile  makes sure the script does not proceed until everybody who responds to that message is done reacting to it.
Finally we redraw the board (7 squares) using:
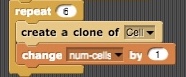
OK, so with each one of 6 repetitions we increment the value of variable num-cells by 1. But how the cells position themselves next to one another? Let's see what happens when a new Cell is cloned:

We see that with a little bit of math (see, math can be useful!), based on the value of the variable num-cells, we can position the new Cell just to right of the previous one. "x" sets the x-coordinate and "y" the y-coordinate, with (x = 0, y = 0) being the horizontal and vertical center of the stage. 66 is the width of each square Cell.
And that is how, each time you click the Start button, a new board is drawn on the stage:
Now let us examine the behavior of the Item sprite. First one is easy:
You can add more than one costume for a sprite. So the simple script above gives us the functionality of clicking on the ball on top to choose a different color. The only reason we added an "if" tile, which is called a Conditional, is to make sure we are not allowed to change the color of the balls which are placed on the board.
We'll come back to Cell later. First let' consider how the add list operation is done. If we look at the Add sprite, all it does is making a clone of Item ball, which will have the current color of the ball button on top:

Now, coming back to Cell, let's see how the newly cloned ball will be put in the right place on the board. Here is the script:
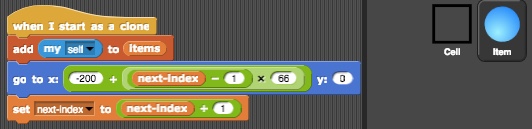
We can see that we are using the next-index variable to keep track of the index of the next available square. Again, some arithmetic will give us the coordinates of where the ball should be placed. We also make sure to increment the next-index by 1, so that the next ball will be placed in the cell one position to the right of this one. Finally, notice that we are adding this ball to the list variable items. Next we will see how this variable is used.
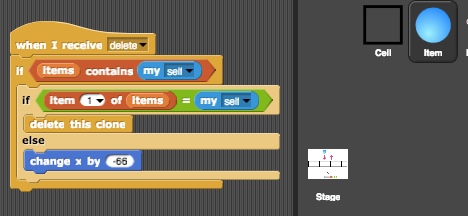
Next take a look at the function of remove operation:
Finally, how does the ball Item sprite respond to the delete message, broadcast by the up-arrow button? Obviously, not all balls respond the same way. If you play with the List demo, you will notice that when you do the remove operation the ball to the far left is removed, and then all balls to its right are shifted by one position to he left, to fill the empty space. Here is the script that accomplishes that:
Can you make sense of it? Awesome!
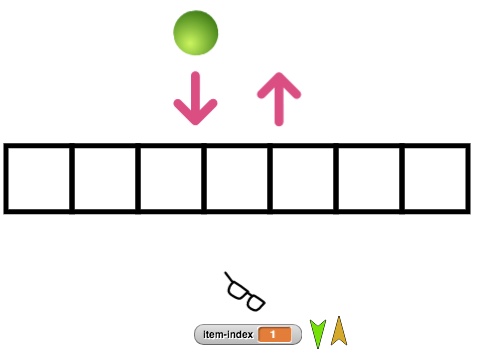
We don't need to examine the eye glasses button for this class today.